So you’ve made your first batch of soap. The bars came out beautifully good color, great scent, nice lather when you tested one in the shower. Now they’re sitting on your counter and you’re thinking, okay, what do I actually do with these?
Packaging is where a lot of homemade soap makers get stuck. It feels like a detail, but it genuinely isn’t. A poorly wrapped bar or worse, a bar with no wrapping at all looks unfinished. Even if the soap itself is incredible, people judge what they can see first. That’s just reality.
The good news is that packaging doesn’t have to be complicated or expensive. You don’t need a fancy setup or a wholesale account with a packaging supplier. You just need to understand a few basics, make some choices that fit your style, and apply them consistently.
Your Soap Isn’t Ready to Wrap Yet Probably
If you’re making cold-process soap, the first thing to know is that fresh bars need time before they go anywhere near packaging. We’re talking four to six weeks of curing in open air. Hot-process bars move a bit faster, usually two to three weeks, but they still benefit from waiting.
Here’s why this matters so much. During cure, soap releases water. It hardens, the pH settles down, and the bar becomes milder on skin. If you wrap a bar that hasn’t finished curing, all that moisture stays trapped against the soap. What happens next isn’t pretty soft spots, white powdery patches (that’s soda ash or glycerin dew), and bars that smell off within a few months.
Feel your bars before you wrap them. They should feel genuinely hard, not just firm. The surface should feel dry, not tacky. The scent should smell clean and even, without any sharp or chemical edge to it. When all three of those things are true, you’re ready.
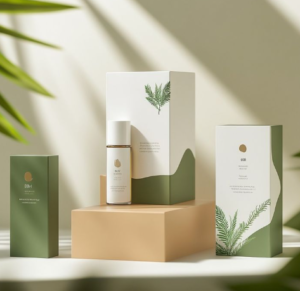
Picking Your Packaging What Actually Works
Walk into any craft store and you’ll see a hundred packaging options. Most of them are wrong for soap.
The biggest thing to remember is airflow. Soap is not a candle or a bath bomb it keeps releasing small amounts of moisture for a long time after curing. Anything airtight traps that moisture and shortens the life of the bar. This is why plastic boxes with lids, zip bags, and heat-sealed plastic pouches are never a great long-term choice, even though they look neat.
Kraft paper wraps are probably the most popular choice among small-batch makers, and honestly it’s deserved. You cut a strip, wrap it around the middle of the bar, and tie it off with twine or seal it with a sticker. Done in thirty seconds. The look is warm and handmade without trying too hard, and customers who care about packaging waste genuinely appreciate it. A lot of makers pair this style with custom Kraft soap boxes for bars they’re selling the box adds structure for retail display while keeping that same natural, earthy aesthetic.
Belly bands are a step up in terms of professionalism. A printed card stock band wraps around the center of the bar and gives you room to put your business name, the bar name, scent notes, and a short ingredient list all in one clean strip. They’re quick to apply once you’ve got a stack printed, and they work really well at markets because the bar itself is visible on the top and bottom.
Shrink wrap is worth mentioning because it’s hygienic and shows off the bar beautifully. If you’ve got a bar with a swirly design on top or nice layers, shrink wrap lets customers see all of it. The drawback is that it reads as more commercial, less handcrafted. It also generates plastic waste, which matters to a lot of buyers these days.
Muslin bags are genuinely lovely for gift packaging. They cost more per unit than paper options, but customers remember them because the bag itself is useful long after the soap is gone it works as a washcloth or a travel pouch. That kind of practical detail is worth paying a little more for when you’re positioning your product at a higher price point.
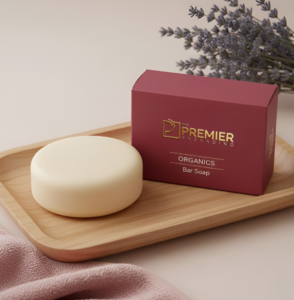
Labels What You Actually Need on There
A lot of first-time sellers underestimate how specific labeling rules are. If you’re selling your soap even at a small local market your label needs to carry certain information.
At minimum: your name and address, the net weight of the bar measured after curing, and a full ingredient list. In the US, the FDA requires ingredients to be listed using INCI names, which are the standardized Latin-based terms so olive oil becomes sodium olivate, water becomes “aqua,” coconut oil becomes sodium cocotte. It sounds fussy, but it’s a legal requirement if you’re selling.
If you’re in the EU, regulations are stricter. A cosmetic safety assessment may be required before you can sell commercially. Worth looking into before you list anything.
For gifts, none of this applies. But even then, a small card with the ingredients and scent notes tucked into the wrapping is a thoughtful touch people notice.
Storing Finished Bars the Right Way
Once your bars are wrapped, keep them somewhere away from direct sunlight. UV light fades natural colorants surprisingly fast lavender soap that looks a deep purple in January can look beige by March if it’s been sitting near a window.
Cool, dry, and dark is the ideal. A shelf in a closet or a cardboard box in a spare room works perfectly. Avoid stacking too many bars on top of each other, especially if your recipe uses a lot of soft oils like avocado or sunflower those bars stay slightly compressible for a while and can get misshapen underweight. Treat your packaging with the same attention you gave the recipe. Customers notice.